Edit 151224: I had accidentally selected ‘ics’ format instead of caldav. Sorry about that. Now it works!
—
Getting your calendar off other people’s servers should be a priority. It’s bad enough that you’re being tracked unwillingly but throwing your daily calendar out there to be viewed is borderline twisted.
I needed a solution where the sync was happening on a machine in my house, not outside. This tutorial got it done for me. I refuse to say anything good about fruit phones or the fruit company, but I will say that if you are temporarily stuck with one that oddly it quite easily syncs with this tutorial as well giving you the very useful access on your mobile complete with alerts. I have not yet figured out Android and rest assured I’ve spent many, many hours trying. My main goal is to focus all my attention on Ubuntu for Devices (Ubuntu Touch/Mobile) but sometimes you just have to survive today…
Before beginning, you will need:
1. an Ubuntu server in your house with owncloud installed on it (that’s a separate tutorial)
2. a static IP address for that server, or at least a dyn dns service (some domain hosts offer it for free) so that when you are outside of your house you can tunnel back in.
*note: you only need one person running the items above if you trust them dearly because you could just set your calendar up on their server. You could put countless thousands on one machine I bet. I’m going to set up my family on mine, for example
3. A computer (preferably Ubuntu) running Thunderbird as your email client.
4. The plugin Lightning installed into Thunderbird.
5. a valid and functional email working in Thunderbird (you could use a free webmail email here but that kind of defeats our purpose of freeing ourselves from these gaffers)
Assuming all of the above is set up and ready, here is what you do:
In Thunderbird/Lightning
1. create a new calendar in Thunderbird/Lightning by going to file/new/calendar in the menu options at the top. Don’t worry about too much and at this point we’ll choose ‘on our computer’ when you get to that point. We will delete this calendar later anyways so don’t get too attached

2. from the left pane, export the calendar as .ics file to somewhere you will remember it. We will come back to this file in a bit

Inside Owncloud logged in as Admin User
1. Make sure that the calendar app is showing up in the list of icons when you hit the top left part of the screen. If it’s not, click the plus sign and search for it and ‘enable’ it.

2. Click the home button top left and make sure the calendar icon is showing in the drop down as per the screenshot below

3. Go to ‘user’ under the option list on top right and add a new ‘user’ for yourself.
Note: if you are like me and want a very secure password for the storage of files on your owncloud server, than what I have done is created another user *just* for my calendar. I won’t be using this ID to sync files or store them. The reason is that I found having a super strong password with lots of randomness is very difficult to deal with on a daily basis as you’ll be using it on a variety of different devices and possibly viewing it on a variety of different computers. It’s up to you.

4. Log in as your new ‘calendar user’ account and you will see an upload icon at the top. Upload your .ics file that you made above (the one I said you’d be coming back to in a bit..)

5. You will see your .ics file appear with a nifty little calendar icon as well

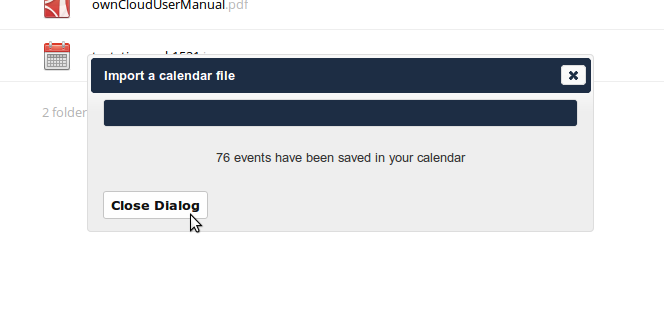
6. Click the name part (not icon) of your .ics file as per screenshot above and an import dialogue will start

7. Go ahead and click that bad boy called ‘import’. Something will start. Or does it? Or does it not? I keep getting this long pause while it seems like it’s frozen and hooped like this:

8. Joy o’ Rapture! It eventually ends and things resume normally and give a message of success and victory
9. Close that bad boy. Now you will be able to go to the top left again to your new calendar. If it was blank, don’t be surprised it’s blank… duh.
10. Now you will get to see a share link associated with this on the left. Click that, highlight it, and copy it to your clipboard.

Back in Thunderbird/Lightning
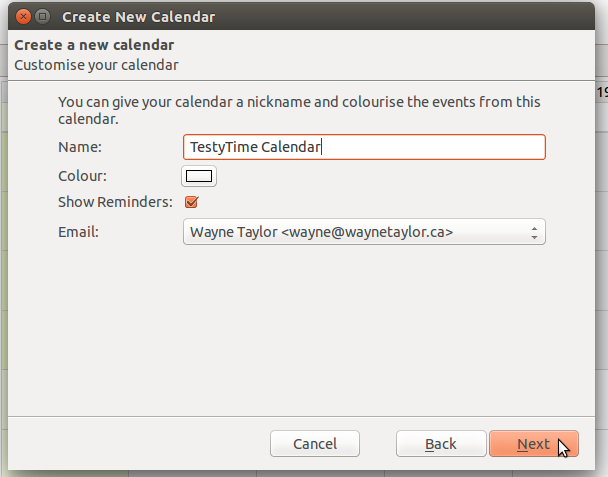
1. Go and create a new calendar yet again. There may be a way to avoid this but I find it faster just to create a new one and delete the old one.
2. As the dialogue starts, choose ‘on the network’ as the option

3. Next. Now you’ll be given a place to paste in your owncloud shared link that you copied into your clipboard above. Paste that in there. Change the radio dial from iCalendar to CalDav

4. Name your precious new calendar.
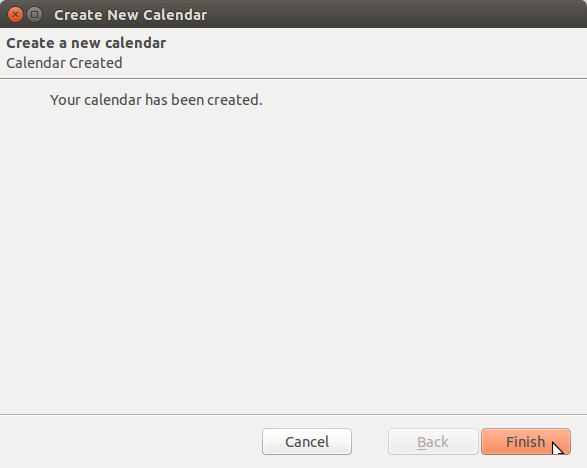
5. You’re done!
Now you have a calendar based on your owncloud server which syncs up with your Lightning running on Thunderbird. I’ve found it to work perfectly so far.
I hope this helps you.
Perhaps if someone chides me I’ll write a blog about whether I ever find an Android option. So far so bad. 🙁
Hi,
thank you for the tutorial.
Can I ask you if you continue to use Owncloud and Lightning?
The synchronize process works fine for me, when I follow your stepts. But when I will get annotation invitations from other users (f.e. from Google Calendar) I have problem with accepting this annotation.
I do successfully “accept” the annotation in Thunderbird, but the invitor don’t get an “Accept” e-mail. Do you have the problem too? Is this a normal behaviour of Lightning and Owncloud?
Hi Harry, honestly I don’t use invitation invites much but I think this might be a problem for me too. It used to work but lately I have the same situation you do. It’s not super urgent for me now so I can’t find time to do it but if you find the solution or update please let me know and I’ll publish it here for others. I’m glad it’s ‘mostly’ working!